Continuous Integration with VSTS – Tips #1
Now that the blog is officially announced and released, I thought I’d show you a quick tip in how we were able to update our main website through continuous integration and continuous deployment. Since this particular website is used just for our marketing purposes, we currently aren’t using deployment slots, so this helps us out a great deal.
All of our code is in GitHub, which I’ll blog about later. The real issue in getting our Web App deployed took us several weeks with a ticket waiting with Microsoft support. In the end it was worth the wait, and as you can see, with this posting it’s now live.
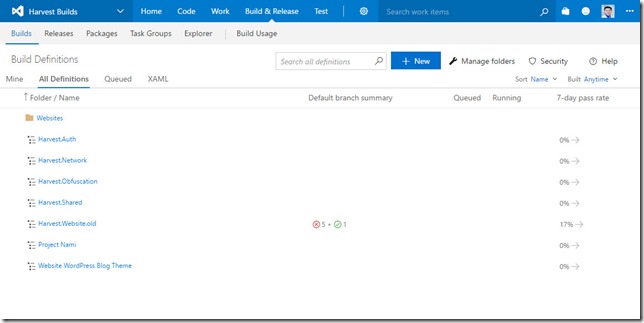
We’ve purposefully put all of our Builds under one Repo in VSTS (Visual Studio Team Services).
As you can see in the picture above, we have Harvest Builds. This is to make our life much easier so that we don’t have to go to a different repo (repository) each time we want to change a build, we can do it all from one spot. An additional thing I’ve started to do is put things under folders so it will be easier to manage.
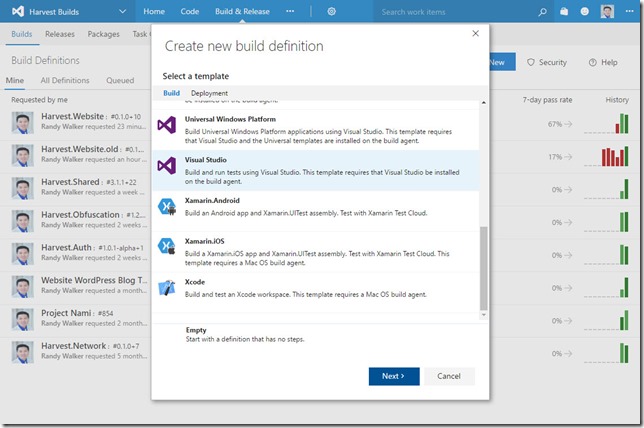
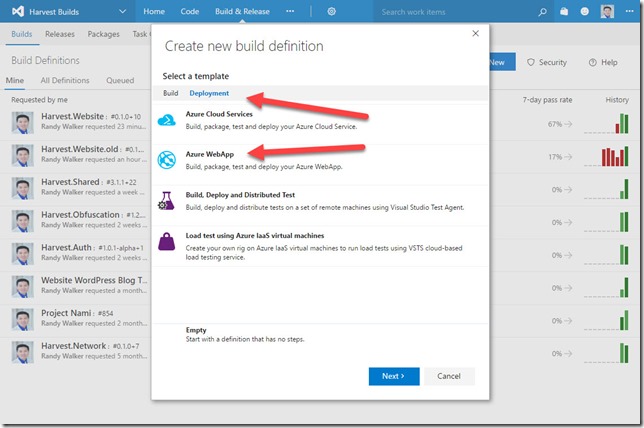
One of the main things I wanted to point out is that selecting the right type of project for your build is extremely important, as it will have presets for you. In our case, we were building a Visual Studio website and deploying it to Azure’s Web App service. From the following two screenshots you can easily tell that you might mistake picking a Visual Studio build rather than selecting the “Deployment” template of Azure WebApp. Sadly I’ve made this mistake several times but it’s easy to see why, since Visual Studio build is what you might think you would normally pick.
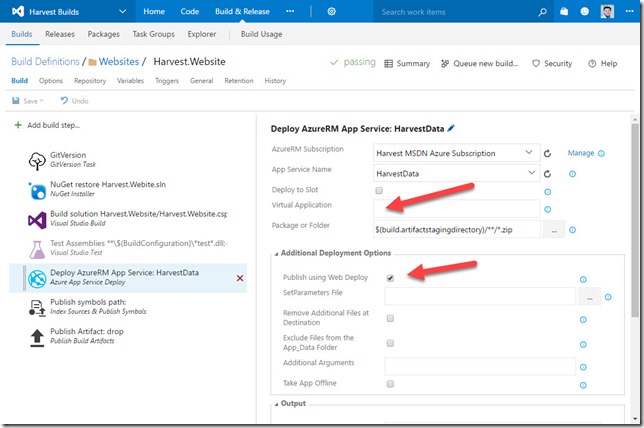
The reason is, as you can see the added MSBuild Arguments. The only thing I configured was the subscription details of where to deploy, and the all important WebDeploy. It’s EXTREMELY important that you specify the Virtual Application that you are running under. For this particular example though, if it’s the root of the website, we leave it blank. It does not need a leading slash, and if you’re deploying to the wwwroot folder no slash is needed at all, just make sure to select Web Deployment.
